Today I'm going to show you how to use the Zed Attack Proxy (ZAP) to debug and test the security of web applications. ZAP is an intercepting proxy that serves as a great tool for security beginners and veterans alike. It provides tools to intercept and modify HTTP/HTTPS and WebSocket traffic, as well as an assortment of other useful tools.
Before I continue, I feel obligated to warn you that you should never, ever, ever use this tool on an application you don't own (that would be illegal). Only use it with a program you're hosting yourself or one you've been given explicit permission to test.
Set-up
Local Proxy Settings
After installing ZAP, you're going to need to do a little configuration to get things running. Firstly, you need to figure out your requirements for using it as a proxy. If you want to direct your browser traffic at ZAP you only need to change your browser's proxy settings to point at ZAP. In most cases, ZAP listens for connections on http://localhost:8080. If you want to intercept HTTPS traffic, it gets a bit more complicated. Zap can generate you a custom root CA certificate to install on your machine so that it can proxy secure connections for you.
To change your local proxy settings, go to tools -> options... in ZAP, and look for the Local Proxy sub-menu. It's also possible to point a device (i.e. Android phone) connected to the same network as your computer to your ZAP proxy. Simply configure ZAP to listen for connections on your IP address, and proxy your device traffic through it.
Contexts
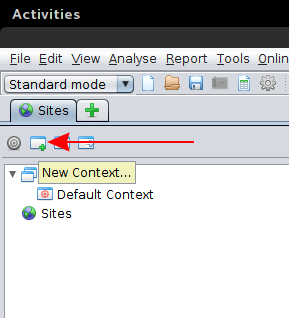
Now that you've got your proxy set up lets create a new context. Contexts are a way to group relevant URLs, so that ZAP only shows you the traffic you care about. Create a new context by clicking on the "new context button" and giving it a name.
For the purposes of this demonstration, I'll be proxying requests from the Webmaker app on my Android phone through a ZAP proxy on my computer. I built a debug version of Webmaker for Android that uses localhost:2015 for storing projects and localhost:6767 for authentication.
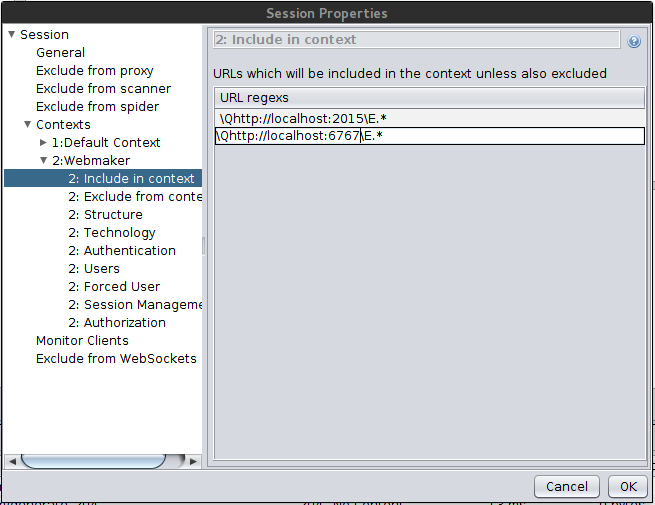
I added these addresses to my Context by navigating to file -> session properties And opening the Contexts sub-menu. From there, select the context you created and find the "Include in context" tab. Add the URLs you're filtering for in the menu there.
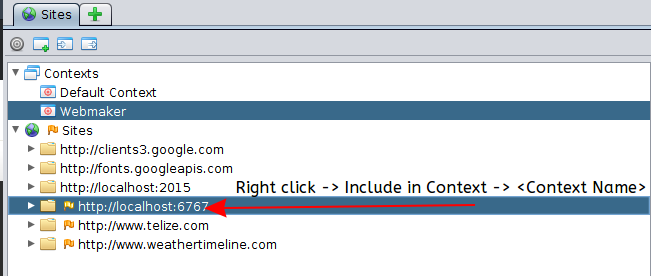
If the hosts already are listed in your Sites tab in ZAP, you can right click and select add to context.
Scope
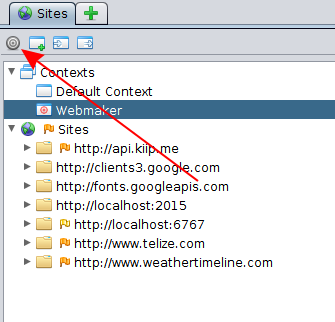
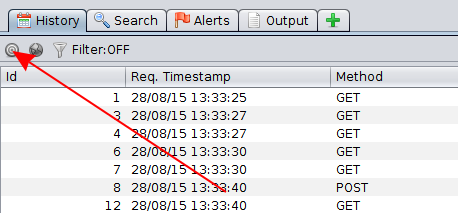
To filter on a configured context, you want to mark it "in scope" and likely mark the "Default Context" as "not in scope". Do so by right clicking the contexts and selecting add to scope or remove from scope as required. Additionally, you must also enable scope filtering in the various lists you see in the ZAP UI by clicking the little bulls-eye symbol:
Inspecting Requests
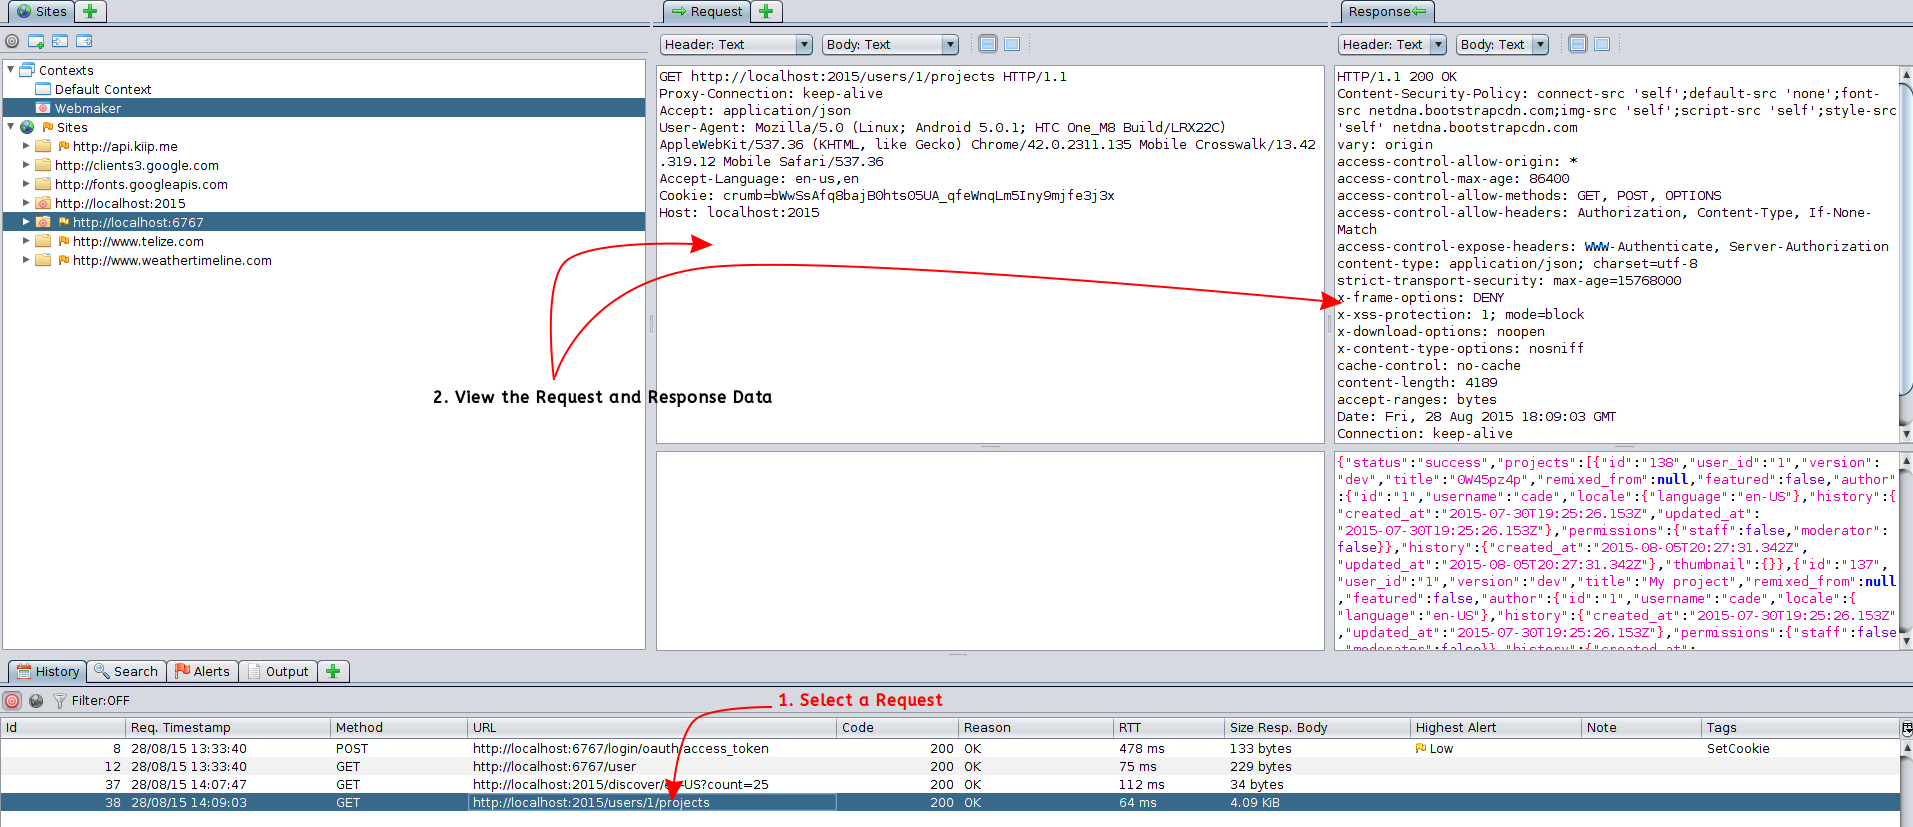
As your proxy intercepts and forwards traffic, it keeps a running log of all the request and response data it handles. You can view this information by selecting a request from the History tab:
This data is invaluable when you're debugging weird issues with external services.
The Fun Stuff
Now that we can record traffic between a client and a server, lets use the breakpoints feature of ZAP to stop a request in-flight and modify it!
Continuing with my Webmaker example, lets create a project, and see what the initial payload looks like:
POST http://localhost:2015/users/1/bulk HTTP/1.1
Proxy-Connection: keep-alive
Content-Length: 169
Accept: application/json
Origin: file://
User-Agent: Mozilla/5.0 (Linux; Android 5.0.1; HTC One_M8 Build/LRX22C) AppleWebKit/537.36 (KHTML, like Gecko) Chrome/42.0.2311.135 Mobile Crosswalk/13.42.319.12 Mobile Safari/537.36
Authorization: token 5712cf871106f07233cfaff7cfba157b3b647c57487151f9e6de19e274031095
Content-Type: application/json
Accept-Language: en-us,en
Cookie: crumb=bWwSsAfq8bajB0hts05UA_qfeWnqLm5Iny9mjfe3j3x
Host: localhost:2015

{"actions":[{"method":"create","type":"projects","data":{"title":"My project"}},{"method":"create","type":"pages","data":{"projectId":"$0.id","x":0,"y":0,"styles":{}}}]}
Here we can see that the app is using the bulk endpoint to create a new project and a starter page for it. Let have some fun!
Firstly we need to right click on the request in the history tab and locate the Break... option (oh how appropriate). In general, the default settings it shows you are fine enough, but there's ways to add conditional breakpoints that you should totally check out!
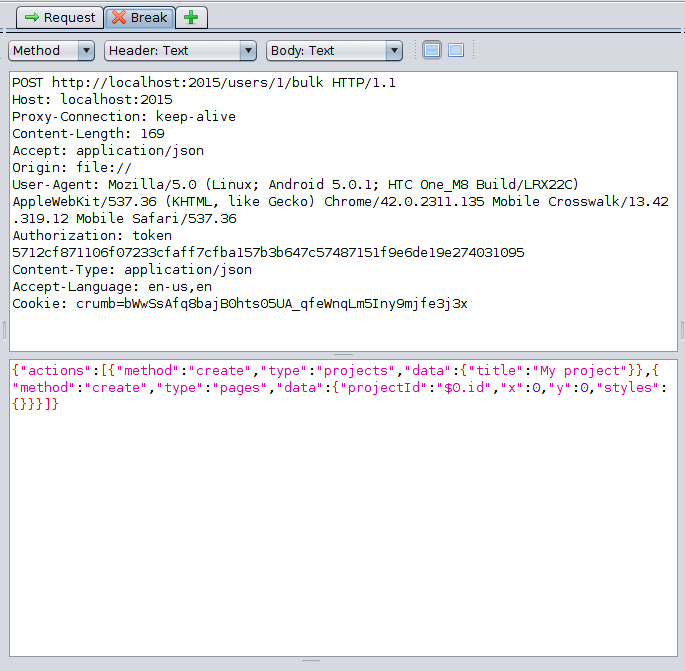
Once you set up the break point, use your client to make the request again. You'll notice that ZAP creates a new tab in the interface called "Break":
This tab lets you modify the request headers and body before sending it along to the destination server. Lets add a second page to actions array:
{
  "actions": [{
    "method": "create",
    "type": "projects",
    "data": {
      "title": "My project"
    }
  }, {
    "method": "create",
    "type": "pages",
    "data": {
      "projectId": "$0.id",
      "x": 0,
      "y": 0,
      "styles": {}
    }
  }, {
    "method": "create",
    "type": "pages",
    "data": {
      "projectId": "$0.id",
      "x": 1,
      "y": 0,
      "styles": {}
    }
  }]
}
Send the request along by pressing the step or continue buttons in the top level toolbar:
ZAP will forward the request to its destination with your changes, and then (if configured to do so) intercept the response for modification as well. In the above example, I produce a new project with two pages instead of one. While this isn't very evil, you may be understanding the power of an intercepting proxy right now:
Don't be too evil

So, there you have it. You now have the knowledge and skills to sit an intercepting proxy up between your client and server applications (hopefully for the purpose of making them better!).
What I've covered today is just a very small part of the things that ZAP is capable of. If you want to learn more, I'd be glad to cover some more topics in the future. In the mean time, you can't go wrong reading the official ZAP wiki

